
With a brand new WordPress site for the HWF, comes some minor changes to how the front page “news items” get posted. It IS a very straight forward, easy system to use and once you have done this a couple of times, it’ll be trivial. I’ll cover this from the start of logging in right to the end of the process where the story gets published. If you have any questions, don’t hesitate to drop me an email, I can easily steer you in the right direction.
Logging In
First, make sure you have your userid OR your email address and your password. With a web browser (Ideally Chrome, Safari or Firefox, make anything Microsoft your last choice in this.
IE/Explorer/Edge/whatevertheycallitthisweek SHOULD work for you, but, best results will be with Chrome and Firefox.
Go to this URL :
https://hancockwildlife.org/login
SPECIAL NOTE! Until we have cutover to the new site, use THIS URL BELOW to login, I will remove this note Friday AM when we are on the new site entirely.
https://hancockwildlife.org/login
And from there, enter EITHER your userid (in this example, I am using monkey-editor so that I see the site as an editor, instead of an admin. Admin level logins have way more things to break on the site 😉 ) or your email, and your password. Bear in mind, this is a different login from the Forum site. While your password MAY be the same on both, it doesn’t have to be nor is it recommended.
Then, click login. With any luck, you will see the next section below. If you do have to run a password reset or something like that, make sure to check your spam filter if the email doesn’t show up.

Introduction
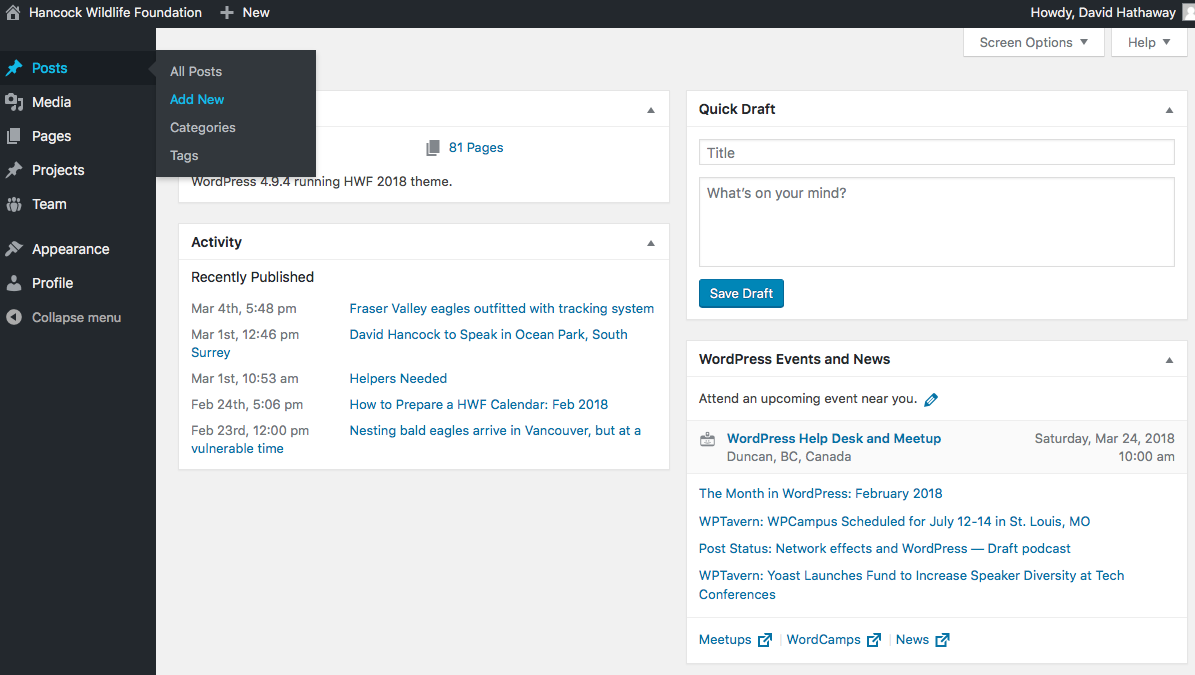
Welcome to the brand new, HWF site dashboard. I will cover other aspects of this page’s menu in later posts, but for this purposes of this, we are making a news post, that will get displayed on the front page, in the section shown below, and also Live Cams/Wildlife News menu link. These get added chronologically and will show up in those places automatically.

To make a new post for this, go to the upper left corner, and click Posts and then Add New (note, if you simply hover over Posts in the left side menu, it “should” expand out to show you the “Add New” section”)
Post Basics
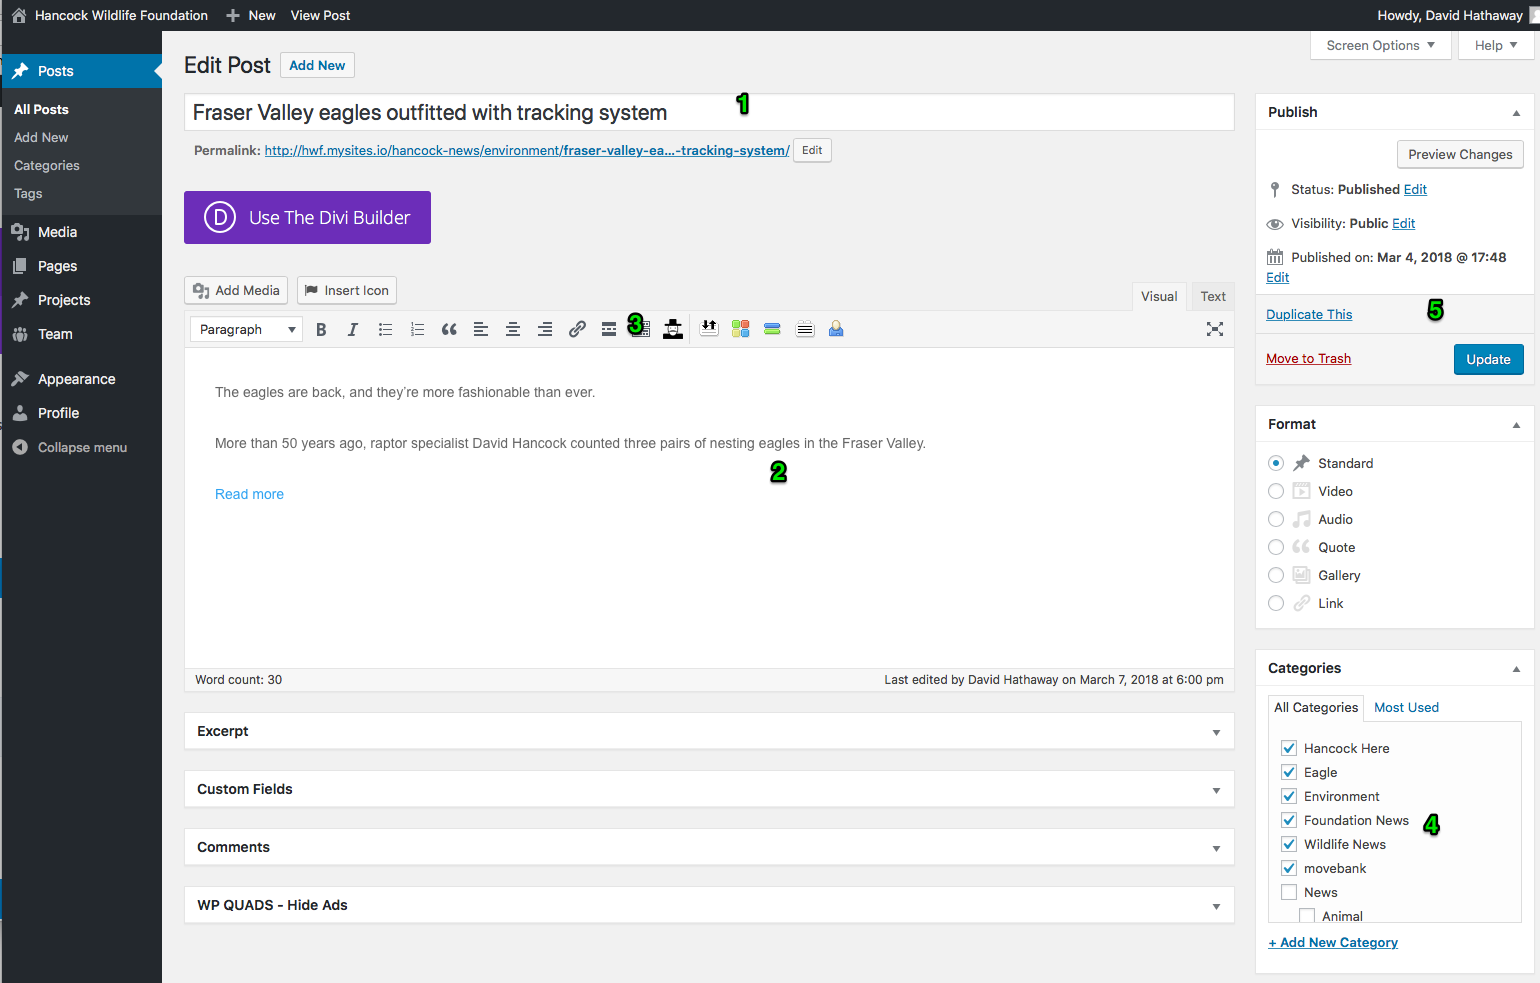
Using the image to the right as a guide, here’s a look at what goes into which sections for a new post. Ignore the “Use Divi Builder” button for now please!
- Title – This would be the title of the news article. Ignore the “permalinks” below this, this gets auto-generated correctly when you publish/save the post.
- Editor Window – This is where the main content for the news story will go. I have used an existing news story as an example for this tutorial, hence why there is some content in the picture. As we move forward with the new site, I’d suggest we can start including a bit more from the article as text in this area. The blue link at the bottom links back to the originating news site as per how we did it on the old site. If you type in “Read More” and then select that text with your mouse, you can click on the chain “link” at the top of the editor window (see 3) and put the URL into there.
- Editor Toolbar – For the most case, the editor area behaves like a dumbed down Word processor, very much like the one on the old site did, with some differences.
- Categories – “Where” news stories display on the site is controlled by Categories. At a minimum, choose “Wildlife News” and a subcategory
- Publish – Once you are all complete with the things above, you can click “Publish” OR, use the “Status” to set as Draft if you want to edit more later, or someone needs to proofread it. There’s also a Preview button you can use.
And, with a little luck and some practice, you will now have a news post live on the site. You can check on the front page, it should now be the top story. If need be, you can manipulate the time/date of the post from the Publish section as well.
Bonne Chance! (it’s easy once you have done a couple…)
For a more in depth look at WordPress and Posts, click below :